


La semana pasada fue el cumpleaños de mi madre, le encantan las flores así que pensé en hacerle unos jarrones. A las dos nos encanta el estilo rústico por lo que cuando vi esta idea de enrollar botellas con hilo de yute y lana me pareció perfecta. En los que vi en Pinterest ponía 'love', pero para este caso preferí cambiarlo a 'home'. El modo de hacerlo es muy sencillo; encontrar unas botellas vacías y enrollarlas con los hilos. En las partes curvas se complica un poco ya que el hilo se resbala pero nada que no pueda solucionarse con un poco de cola. Para decorar utilicé hilo de yute, botones, un trozo de tela de ante con la que hice las flores de la 'h' y tela de arpillera para la flor que hace de 'o'. A mi madre le encantaron aunque todavía está buscándoles sitio.
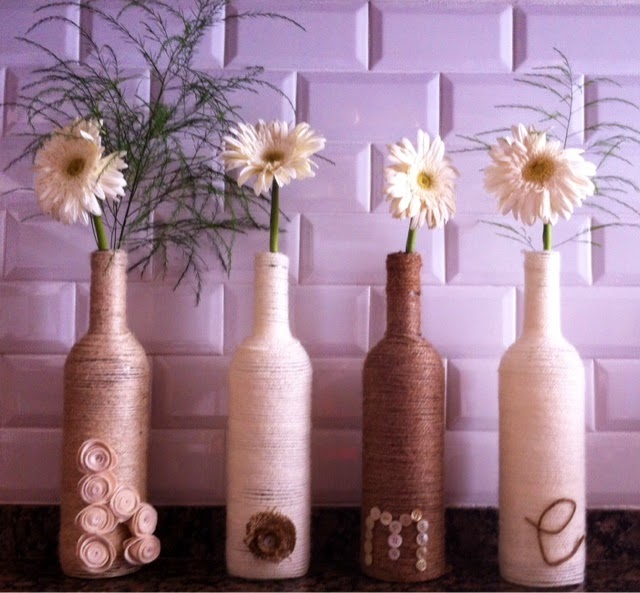
My mom's birthday was last week, she loves flowers so I thought to give her a vase. We both love rustic so the idea of wrapped bottles was perfect. The ones I saw in Pinterest said 'love' but I thought 'home' was best in this case. The 'how to' is really easy; find some empty bottles and wrap them with wool, hemp or whatever you have in hand. The curve areas are a bit tricky but you can put some glue to help fix the threads. In order to make the letters I used hemp, buttons, a piece of sackcloth to make the 'o' and some fake suede to make the flowers in the 'h'. My mom loves them although she hasn't found the right spot to put them yet.